Content
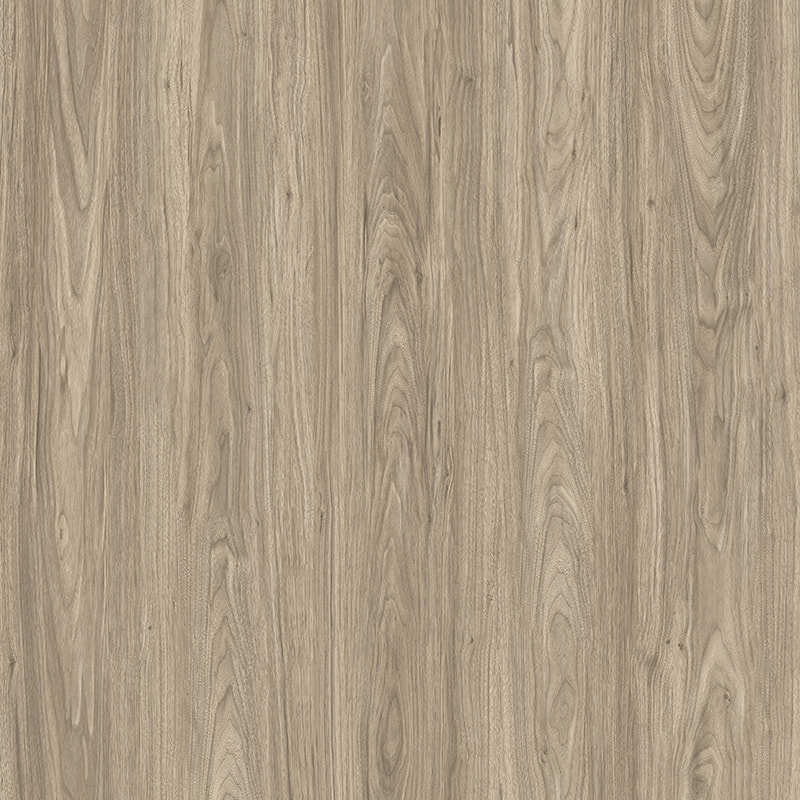
Walnut decorative film is a thin, flexible surface covering material printed or embossed to replicate the appearance of real walnut wood. It captures the characteristic dark brown tones, open grain structure, and natural figuring that make walnut one of the most desirable hardwoods in furniture and interior design. The film is typically manufactured from PVC (polyvinyl chloride), PET (polyethylene terephthalate), or TPU (thermoplastic polyurethane), and it comes in self-adhesive, heat-activated, or pressure-sensitive formats depending on the intended application.
Modern walnut wood grain decorative film is produced using high-resolution rotogravure printing combined with mechanical or chemical embossing to create tactile surface texture that closely mimics the feel of sanded or lacquered walnut timber. Higher-end products incorporate synchronous embossing — a process that aligns the printed grain pattern precisely with the physical surface texture — resulting in a finish that is difficult to distinguish from genuine wood at close range.
The product is sold in rolls of varying widths — commonly 0.6m, 1.22m, and 1.52m — and in thicknesses ranging from 0.08mm for lightweight furniture wrapping applications to over 0.5mm for rigid decorative panels used in architectural interiors. It is used by furniture manufacturers, interior decorators, renovation contractors, and increasingly by individual homeowners undertaking DIY upgrades.
Not all walnut decorative films are the same. The material composition, adhesive system, surface finish, and intended use vary considerably across product categories. Understanding the differences helps you pick the right product for your specific project rather than buying something that looks good in the roll but performs poorly once applied.
This is the most widely available format and the one most DIY users will encounter. It has a pressure-sensitive acrylic adhesive pre-applied to the back, protected by a silicone release liner. Peel the liner off, position the film, and press it down. The adhesive activates under hand or squeegee pressure. Self-adhesive walnut vinyl film is suitable for flat and gently curved surfaces including furniture panels, cabinet doors, shelving, and walls. Quality varies enormously — budget films use water-based adhesives that fail in humid environments, while premium versions use solvent-based or hybrid adhesives rated for kitchens, bathrooms, and high-traffic furniture.
Heat-activated or thermoformable walnut film does not have a pre-applied adhesive. Instead, it is bonded to the substrate using a heat press or hot-glue membrane press — a process commonly used in furniture manufacturing plants. The film softens under heat, conforms tightly to the substrate surface (including routed profiles, beveled edges, and 3D shapes), and bonds permanently as it cools. This format produces a far more durable and professional result than self-adhesive film, which is why it is the standard choice in cabinet and flat-pack furniture production. It is not suitable for DIY use without specialist equipment.
Some walnut decorative films are manufactured as thicker, semi-rigid sheets laminated directly onto MDF, particleboard, or plywood during production. The result is a finished decorative panel sold as a complete product — the film is not applied separately. These laminated walnut panels are used extensively in kitchen cabinetry, office furniture, retail fixtures, and architectural wall cladding. The bond is extremely strong because it is formed under industrial pressing conditions with structural adhesives, and the surface finish is protected by a UV-cured topcoat for scratch and chemical resistance.
Designed for temporary or rental applications, removable walnut film uses a low-tack repositionable adhesive that allows the film to be peeled off cleanly without damaging the underlying surface — provided the surface has a smooth, sealed finish. These films are popular for rental apartments, pop-up retail spaces, and staging properties for sale. They are thinner and less durable than permanent options and should not be expected to last more than two to three years in high-use areas.
Walnut wood grain film is remarkably versatile, but it performs best in specific contexts. Knowing where it excels — and where it falls short — will help you plan your project realistically.
A common question is whether walnut decorative film is a reasonable substitute for genuine walnut veneer. The answer depends heavily on budget, application, and how close an observer will be to the finished surface. Here is an objective comparison across the most important factors:
| Factor | Walnut Decorative Film | Real Walnut Veneer |
| Cost | Low — typically $2–$10 per sq meter | High — $15–$60+ per sq meter |
| Visual Realism | Good to excellent (premium grades) | Authentic — natural variation |
| DIY Application | Easy to moderate | Difficult — requires skill and tools |
| Moisture Resistance | Excellent (PVC-based) | Poor unless sealed properly |
| Repairability | Section replacement possible | Can be sanded and refinished |
| Durability | 3–10 years depending on grade | 20+ years with proper care |
| Pattern Consistency | Uniform — repeat pattern visible on large areas | Unique — each piece is different |
| Environmental Impact | PVC production has environmental costs | Uses real wood — sustainability depends on sourcing |
| Curved Surface Application | Good with heat gun assistance | Limited — veneer can crack or split |
For most residential renovation and budget commercial projects, walnut PVC decorative film delivers outstanding value. For high-end bespoke furniture, heritage restorations, or applications where tactile authenticity is paramount, real walnut veneer remains the superior choice.
Proper application is what separates a professional-looking result from a bubbly, peeling disappointment. Even the best walnut vinyl wrap film will fail if the surface preparation or technique is wrong. Follow these steps carefully for a clean, lasting finish.
This is the most important step and the one most people skip. The surface must be clean, dry, smooth, and free of wax, oil, grease, and loose paint. Wipe the surface with isopropyl alcohol (IPA) on a lint-free cloth and allow it to dry completely — at least 10 minutes. Fill any dents, holes, or scratches with appropriate filler and sand flush. If applying to raw MDF or particleboard, seal the surface first with a coat of primer or diluted PVA, as porous surfaces reduce adhesive performance. Glossy surfaces generally bond better than matte or textured ones.
Measure the surface to be covered and add at least 50mm overhang on all sides. This gives you room for adjustment during positioning. Cut the film with a sharp craft knife or scissors along a straight edge. If the surface has a directional grain pattern — as walnut does — plan your cuts so the grain runs consistently in the intended direction. On large surfaces that require multiple strips, plan the layout in advance to minimize or hide join lines, ideally placing joins in corners or at natural visual breaks.
For small areas (under 0.5 sq meters), dry application — peeling the liner and pressing the film directly — works well. For larger areas, a wet application technique using a diluted soapy water solution (a few drops of dish soap per liter of water) sprayed onto the surface before applying the film allows you to reposition the film freely before squeegeeing out the water and activating the adhesive. Not all walnut self-adhesive films are compatible with wet application — check the manufacturer's instructions first, as some adhesives are water-sensitive.
Use a felt-edge squeegee or a rigid plastic card wrapped in a soft cloth to work air bubbles and excess water out from the center toward the edges. Apply firm, even pressure. Work in overlapping strokes rather than random directions. On dry applications, work slowly and methodically — once the adhesive contacts the surface it is difficult to reposition without risk of stretching or tearing the film. Post-heat the applied film with a heat gun or hair dryer set to medium temperature to activate the adhesive fully and improve the bond, especially around edges and corners.
Use a sharp craft knife guided along a metal straight edge or a trim knife along the edge of the surface to cut the overhanging film flush. Change blades frequently — a dull blade drags and tears the film rather than cutting cleanly. On exposed edges, fold the film around by 10–15mm and adhere it to the back face for a neat, finished appearance. Alternatively, apply a matching edge banding strip or seal the raw film edge with a thin bead of clear contact adhesive to prevent lifting over time.
Even with good technique, issues can occur. Here's what to do when things don't go perfectly:
The market is flooded with walnut wood grain films at a wide range of price points, and quality varies dramatically. Paying a little more for a reputable product almost always makes sense — cheap films fade, peel, and look unconvincing in ways that become obvious within months. Here's what to look for when evaluating options:
Once applied, walnut decorative film is relatively easy to maintain, but a few simple precautions will significantly extend its lifespan and keep it looking sharp.
For everyday cleaning, a soft damp cloth with mild detergent is all that's needed. Avoid abrasive scouring pads, bleach-based cleaners, or acetone-containing products — these can dull the surface finish, lift the edges, or dissolve the adhesive layer. On kitchen surfaces, wipe up cooking oil and food spills promptly, as prolonged exposure to grease can eventually soften the adhesive and cause lifting at edges and seams.
Keep sharp objects away from film-covered surfaces where possible — while thicker walnut faux films are scratch-resistant, they are not scratch-proof. Use coasters, placemats, and desk pads to protect frequently used horizontal surfaces. In areas subject to heat — such as kitchen counters near the hob or dining tables with hot plates — use heat-resistant pads and ensure the film you selected is rated for thermal resistance above 80°C.
Inspect edges and seams periodically, especially in humid areas like kitchens and bathrooms. If an edge begins to lift, re-bond it promptly with a small amount of contact adhesive before the lifting propagates further. Catching edge lift early is much easier and cheaper than replacing an entire panel.


Contact
 China Company Address: No.5 Zhaojia Road,
Vietnam Factory Address: GNP Yen Binh
1 - lndustrial Center (Lot CN13,CN18,Yen
Binh Industrial Park, Ward, Dng Tien, Ph8 Yen,
Thai Nguyen 24000)
Thailand Factory Address: 289/12 Moo 7, Klong Kiu Sub-District, Ban Bueng District, Chonburi 20220 THAILAND
China Company Address: No.5 Zhaojia Road,
Vietnam Factory Address: GNP Yen Binh
1 - lndustrial Center (Lot CN13,CN18,Yen
Binh Industrial Park, Ward, Dng Tien, Ph8 Yen,
Thai Nguyen 24000)
Thailand Factory Address: 289/12 Moo 7, Klong Kiu Sub-District, Ban Bueng District, Chonburi 20220 THAILAND
 Tel: +86-13685281168
+86-13813687178
Tel: +86-13685281168
+86-13813687178
 E-mail: [email protected]


 English
 русский